| Configuration -> Table Layout |
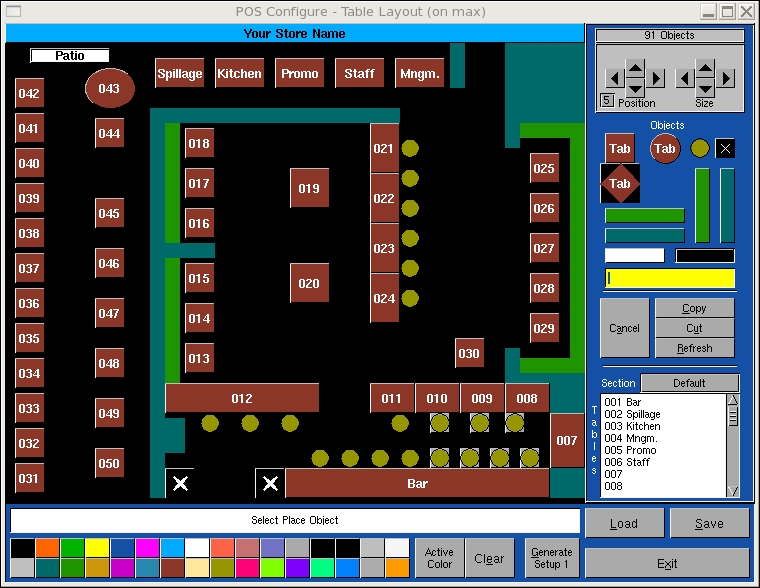
One method of choosing tables is to create an image of the store layout. Servers simply touch the image associated with a table. In order to activate this option, you must select the layout option in the "General Setup -> General -> Tables -> Display" area.A number of objects are available in the upper right hand side of the screen. The objects titled tables are the only ones that will be used as table selectors. The other objects are used to indicate bar stools, bench seating, walls, Touch Screen locations and headings.
To add an object to the Black canvas area, simply touch the object and touch the canvas in a location you wish to object to be located.
Once an object is located on the canvas, you can position the object using the position arrows or the cursor keys. To scale the object you can use the Size buttons or use the "ALT" arrow keys.
The white object is used for headings. Type the heading information in the Yellow input field and place the object on the canvas.
Once the layout is complete you must assign table number to each table object. Touch the desired table located in the table list and touch the corresponding table object.
Once you have assigned all of the tables to the layout table objects, save your changes.
Cancel: Deselect any selected object.
Cut: Remove a selected object from the canvas.
Copy: Copy the dimensions of an object for use as the default dimensions of that object type.
Load: Used to load an existing layout.
Save: Used to save the current layout.
Exit: Used to exit the program.