| Menus & Inventory -> Placement |
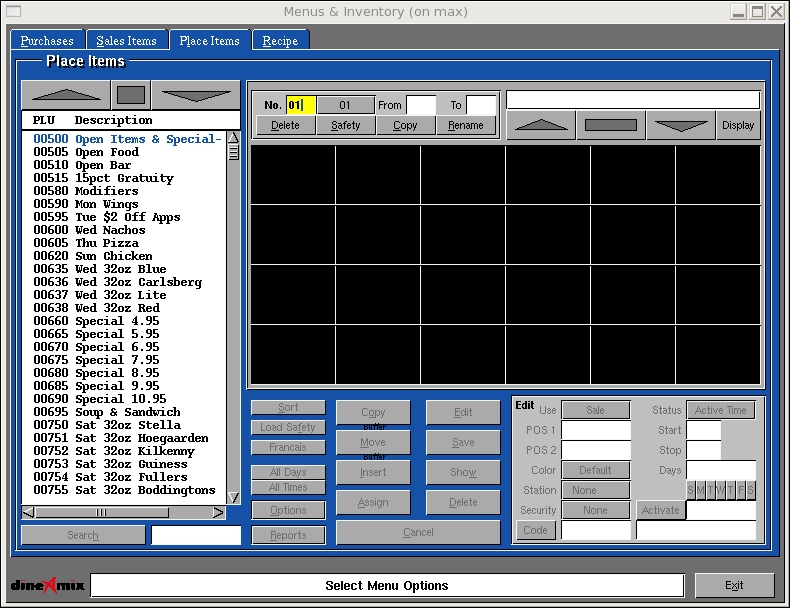
After having created A list of sales items we can now place them in a menu for use at the POS. The system support up to 50 separate menus ranging in numbers from 01 to 50. Each menu is a different view of the same list of sales items. If for example the store only vends a subset of sales items at a station only those items need be included in the menu for that station.Menu operations are divided into 2 categories. The first operates on menu as a whole. The second operates on items within a menu. The following describes the creation and maintenance of Menus.

Menus Operations
Presentation & Movement
Before we cover the options available for manipulating menu items let us digress for a moment to explain the menu presentation and movement principals.

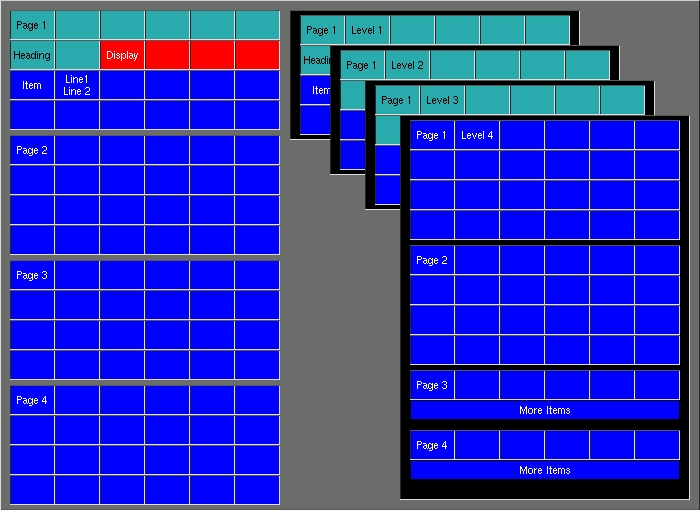
Pages: The POS can display 96 items or Cells per level broken into 4 pages of 24 items each. Using the Page Down and Page Up buttons will display the next or previous page of 24 items respectively.
Levels: When the POS first displays the menu it is said that we are at the first level. Pressing a Heading item will load another set of items or headings. This step can be repeated till we are at level 4. At level 4 only menu items can be displayed. Headings have no meaning at this level since there are no more levels to move to.
The example on the left shows the 4 pages of 24 items that can be accessed from a Level. The example on the right shows each new level that was access by pressing the heading from the level above.
Menu items are made up of 3 basic types.
Menu Items
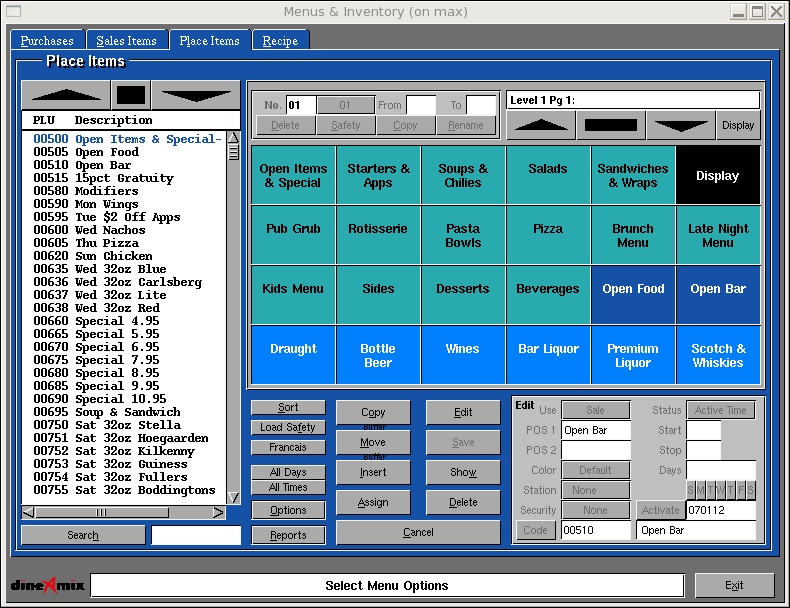
To add a Sales item to the menu, simply select an item from the sales list and touch a cell in the menu area. doing so will create a new item in the menu. Title items from the Sales list will be converted to Headings in the menu. Regular items are placed on the menu as a Sale Item. Assembly and Include type Sale items are not permitted to be placed in a menu.Menu items are saved at the time you place them. To add a "Display" item, press the edt button and touch a menu cell. The edit screen will become active. Choose the item type "Display" and save your changes. (See below for more details).

Edit: Used to edit menu item information. Press the "Edit" button and press a menu item. Add or change the information as required and press "Save" to record your changes.
Show: Used to view item information. Press the "Show" button and press menu to view its contents. The menu item information will be displayed in the Edit screen.
Delete: Used to remove a menu item from from the Menu. Press the "Delete" button and press a menu item. You will be prompted to Remove the item and prompted again if want to remove the empty space that would normally be left on the screen.
Copy: Used to copy item information from one location to another. Press the "Copy" button the enter the copy mode. Press the menu item you wish to copy and press the location of the new menu item.
Move: Used to move a menu item to another location. Press the "Move" button and press a menu item. The item will be removed from the screen. Press a menu cell to insert the menu item to that location.
Insert: Used to insert a new menu item. Press the "Insert" button and press a menu cell . Other cells will be moved to the right and a new space will be made available.
Assign: Used to copy information from the edit screen to menu items. Press the "Assign" button. Enter the information you want to copy to menu items in the Edit screen. Now press the menu items you want to assign the information to.
Sort: Used to sort item alphabetically. Press the "Sort" button.
Safety: Used to re-load the original menu contents to your working copy.
Francias: Used to change working language from English to French and back.
All Days: Use to change the menu programs idea of the current day. This is useful to test dated items.
All Times: Use to change the menu programs idea of the current time. This is useful to test timed items.
Options: The following options are available;
Search: Used to find an item in the lists.
Enter some information in the line below the search button and
press Enter. The system will look through the list and highlight the
firsts occurrence of you search. Press
"Search" again to keep searching through the list or "Cancel" to stop.
Cancel: Used to exit an edit mode or if no mode is selected it will return you to the menu operations mode.