| Configuration -> Locations -> Streets |
Before we can use the Delivery Lookup feature of the POS we must define the streets that will be served by the store.
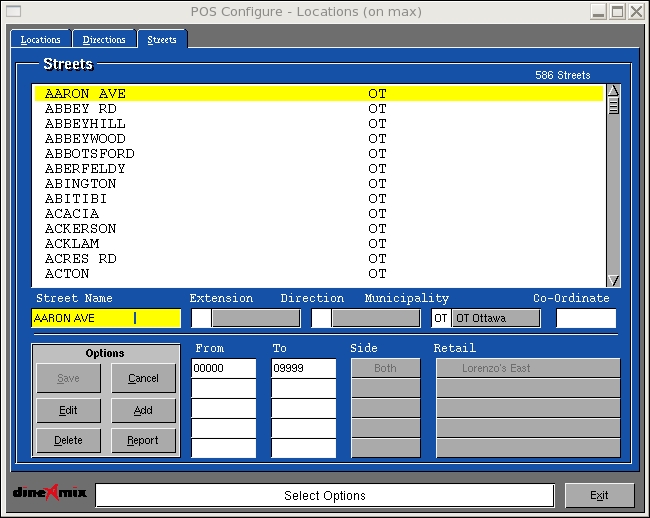
Add: Used to add a new Street. DO NOT press the Add button until you have completed the following steps;
1. With your cursor in the "Streets Name" field type in the name of the street you wish to add. The street name cannot have any blank spaces in it.
2. Select a street extension if applicable.
3. Select a Street direction if applicable.
4. Select a Municipality
5. Press the "Add" button.
6. In the from field enter the lowest street number that will be serviced on that street.
7. In the To field enter the largest street number that will be services on that street.
8. Select which side of the street will be services from the "Side" option List. This options are as follows;
Steps 6 to 9 can be repeated for up to 5 ranges.
Save: Used to record your changes from an "Add" or Edit" mode.
Edit: Used to change a Street Information. Select a Street from the list and press "Edit". Change the information as required and press Save to record your changes.
Delete: Used to remove a Street from the list. Select a Street from the list and press "Delete". You will be prompted to confirm your choice.
Cancel: Used to deselect a Street from the list or to exit the "Add" or "Edit" modes without recording any changes.
Report: Used to print various reports.